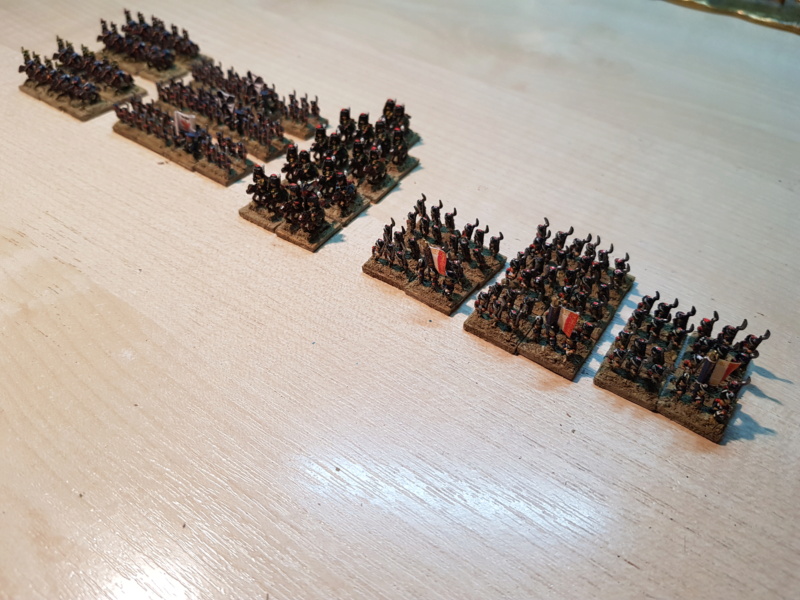
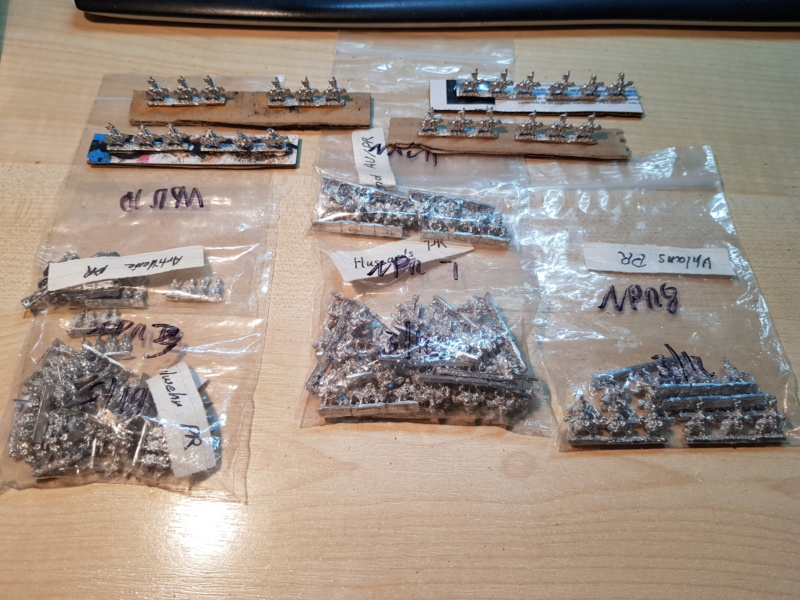
Showing posts with label workbench. Show all posts

Wednesday, February 3, 2021

Basing PR&FR - 6 mm - What was done on January 2021

 Hi,

As a follow up about the few past weeks, here is the status of on-going Prussians and French, finally based, and so done.

As an introduction, here they are :


From top left, to bottom righ are : 2 PR Uhlan Rgt (1st and 3rd), 3 Landwehr batallions (PR), 1st Rgt des Chasseurs à Cheval de la Garde (FR), and 3 batallions of grenadiers from la Vieille Garde (FR).

Before insights, here is how I based them.
I have very (I mean, really very) few place for this hobby.
That is the reason why I practice it by sessions.
Anytime, I need to get anything cleaned and prepared, then anything put back in place (and cleaned as well).
That "entry" ticket cost me about 15 minutes on each side.
So, I qualify and plan what to do, prepare a volume so not to spend more time setting/un-setting than really working, then... I start a session.

This session was based on the following :

Enough minis on their bags, enough bases, glue and some basic tool... so let's go.
Baccus strips are 4 minis per strip. I base 2x3 minis in two rows per base.
So, cutting is obviously needed.
But as a first step, strips bases need to be flatten because of "melting spots(?)" that could remain and painting temporary basing glue residues.


Obviously I do that as well before initial painting temporary basing, but now, up to base mini by mini sometimes, I pay a special attention so that each mini have a perfectly flat basement. It's easier, and safer, to do this with a strip rather than on individual detached minis. Also, take extreme care : Just slide gently the strips on the tool : hold them firmly but smartly, don't break anything !

I cut the bases as small as possible while preserving mini attach points to its' basement. So each strip is reduced to three minis strips, and I obviously keep the fourth one.

When basing, I always start by "the fourth" minis, the ones that are alone, and put 3 of them on the rear rank. This way, I may position them gently, not being in trouble with a front rank that would not let finger room for alignment. Front ranks are always the three "survivors" of the original strip. I glue them at a second step, as such :


The glue I use to set them in place is a basic (but really good) gel glue from Scotch (the green one - see first picture). It perfectly does the job for years and is not expensive.
Once minis are in place, I use white glue to seal them and flock.
I put a somewhat thick layer (very slightly diluted) on the base with an old brush.
Then I flock.
As it will dry, all minis will be sealed one to each other, reinforcing the overall solidity of the base.


For flocking, I use basic wood sawdust. On the picture it seems brown, but in fact it's green. (Mobile camera used)
Go to a place where they cut wood, be polite and gentle, ask accordingly and then you should get enough of it for 10 years.
Tint it with basic acrylics of various bright browns, green, and yellow (and mixes), let it dry (to avoid moisture), then you are done.
Don't forget the tip for the guy behind the saw...

You may find better "dedicated" basing flocking material, obviously, but it is expensive and for the size of the bases I deal with it is not justified on my side.

So, after all this "blabla", some closer pictures.
First the Prussians :

Then La Vieille Garde :

And finally les Chasseurs à Cheval de la Garde :


Do not hesitate to comment or share you way for basing.


Thanks for reading,
Cheers and take care.

Bruno.


Sunday, January 31, 2021

Napoleonic Prussians - 6mm - 3 Landwehr battalions

 Hi,

So, those three battalions are painted, varnished and ready to be based.
Here they are :

Flags are from my napflag stock. It seems historical flags attribution to Landwehr was somewhat random during the Napoleonic area, so for those of you that are knowledgeable about those they may sound as an heresy, but however I had to make a choice. Do not hesitate to comment your insights, as more Landwehr battalions will join in the future.

Colors used are from acrylic Prince August range (except specified otherwise).
Here they are :

Pant and rolled mantel : 836 (grey)
Uniform : 965 (blue)
Distinctive  : 817 (red)
White : 912 (ivory)
Black : 950
Rifle wood : 846 (mahogany ?)
Skin: 927
Gold : 996
Steel : Vallejo Metal Color 77.716

They have joined their little bag, waiting for basing.
Perhaps will I start basing as I have enough bases now and enough miniatures to start a session.
Not sure yet (will have lunch first - nothing is better than a good "blanquette de veau" to make your mind ;-) ).

Regarding Prussian painting, as next step, I also plan one artillery battery (4 guns / 16 crews) and 2 Hussars regiments ( 12 miniatures each).

And yes... after that I will take a break from Prussians, adding some more British Infantry and Cavalry to my armies...

Cheers and take care,

Bruno.

Saturday, January 30, 2021

Nap flags - 6mm to 15 mm - A tribute to Mr. Pendlebury

 Hi,

Before getting back to my Prussians, I though it was time for a tribute.
About 25+ years ago I discovered a site that you may know, with a huge work about flags of the Napoleonic area.
From that time, I always use it as a major reference for flags.
This site is napflags, kindly hosted by www.warflag.com since end 2001.
Here is a direct link to the napflags index :

napflags by Mr. Alan Pendlebury

Resized and printed, here is what it gives at 6mm scale :

This is a sample of mounted flags. Left to right are some French (1812 and 1804 patterns), Austrian, Prussians, English and Brunswick flags.

The site contains a quite exhaustive listing for any nation of that time, their flags and also historical information.

Flags have to be resized. For this I use Inkscape, a powerful open-source vector drawing tool. I paste the flags picture in it, create a semi transparent colored box at the exact size I wish (ie. 9x9 mm) and put it at the foreground, then resize the flags bitmap in the background to match this size matrix, as such :


This way I create a full page of flags, as such :


Then I print on inkjet paper of good quality (labeled as "photo" quality, but light paper - should be less than, or around, 80g/m2 - low cost but good material), label the regiments when it has to, and cut flags strips :


Here is part of my flags, with mostly French and Prussian flags.

I also use this tool and napflags to label my packing boxes, labels, counters, etc... as such :


That's how I proceed for my flags, and that would not have been possible without the huge work done by Mr Pendlebury, as well as his will to share it freely.

So I just wanted to say thanks to him, wherever he is, and share with everyone it could help and would not be aware of this exceptional resource.

Thanks Mr. Pendlebury.


Thursday, January 28, 2021

Needing more bases... so created 192 bases, 45 minutes, 0.19 cents each.

 Hi,

From past Sunday, my 3 Prussian Landwehr batalions move forward gently.
However, I had not enough bases, between FR old guard, Uhlans, and Lanwehr to come... 4 bases were a little bit short.


So, yesterday evening I created some.
What follows is really basic, and I believe the way I did is nothing new under the sky, but in case it may help someone, I share it.

This is an inexpensive (but clean) way I use since I started wargaming.
For me it works really great

Those 192 bases were done in about 45 minutes.
Each 1.5x1.5 base cost me 0.1953 € cents. (to be precise)

Here is the thing.

Buy a cardboard based folder such as this one (~1.5 €) :


Then cut one fold and remove the plastic and paper cover on each side of the half folder you use. (so you use 0.75 € material so far - stock remaining parts)

Just do a soft incision on the top of one side, all along, then the thing will come smoothly as you peel it off.

Then print a pattern for the bases you wish.

For anything graphical I use InkScape (Open Source Software).With such tool, creating such matrix is a matter of minute, millimeter sized and perfectly adjusted.

You cut the paper matrix to remove margins, then glue it to the card board.
Once dry enough you cut the matrix at exact size (roughly 1/2 of the fold - "landscape" mode). So you use half of the material (0.375 €) and keep the remaining for later use, so not wasting anything.

Then you return your prepared matrix and paint some basing basic color with basic acrylics.


Let it dry for about 10 minutes with some heavy book on it (not on the painted side).

Then return and pre-cut your bases following the matrix lines.


So, one will think ... here you will spend hours...
In fact, no.
Take a steel ruler, use it to guide the blade to do a partial cut on the lines. Horizontally and vertically. Take care and do it slowly, not too strong but a bit, for three reasons :

  • You do not want to cut your bases yet, just create the blade path doing so later on
  • You do not want to waste any of the 192 bases you plan to produce
  • Eventually, remember you only have ten fingers. ;-)

On my side two passes per line, not too strong are enough.

Then you do not need the ruler anymore. From the marking you did, the blade will cut smoothly without getting out of it. Also, remember you only have ten fingers, so do it slowly and quietly, take care.

Start cutting strips, then take each strip and cut (detach?) the bases.

So, after about 20 minutes, here you are :


Your bases should be exactly the same size, will have one side pre-painted, one side with a white label... and they costed only 0.001953 €, so 0.1953 cents each.

Now, I have another issue.

I have too much bases for my minis... ;-)

Sunday, January 24, 2021

Napoleonic French - 6mm - WIP part II

 Hi,

Here is a short advancement status about the old guard I started about one week ago.

Status and pictures :

On going Grenadiers of the old guard are painted and varnished.


Same thing about the Chasseurs à Cheval de la garde.


They have been painted on evenings, by 1+ hour sessions along the week.
As a total time spent, I may estimate between 4 and 5 hours of total work to get there (for each of Grenadiers and Chasseurs, so about 10 hours total)

Paints I used :

I used a black primer (brushed Humbrol black matt 33, slightly diluted) then I used Prince August (Vallejo) acrylic colors except when said otherwise. Here are their references (numeric only as names are in french).
Conversion tables exist between PA and Vallejo references, so that should not be an issue if use Vallejo rather than PA.(ie : (PA) 970 = (V) 72)

For grenadiers :

Uniform blue : 965
All whites : 918 (Ivory - I never use pure white)
All blacks : 950
Red : 817 (kind of scarlett red)
Rifle wood : 846 (Mahogany ?)
Back pack : 875 (clear brown beige ?)
Rolled jacket : 836 (a grey - realized once done it should have been blue for the guard)
Flesh : 327
Gold : 996 - Metal colors in standard Vallejo/PA are not good. I still use that one (as I have it) but it has to be applied on a black background. At a time I will better use Vallejo Airbrush Metal Color (see thereafter).
Steel : Vallejo Airbrush Metal Color 77.716 (Aluminio satin) applied with a brush (obviously). That metal color is far better than any conventional Vallejo/PA metal colors.

For Chasseurs à Cheval :

Green (saddles/uniform) : 970
Trumpet exception (blue) : 840
Yellow : 948 - I prefer that "gold yellow" as offering better coverage and color depth than regular yellow.
Horses : 846
All other colors (red, white, black, metal,...) are like Grenadiers.

As a varnish I use an art acrylic painting varnish (Amsterdam 115 MATT for acrylic - brush applied). My 250 ml bottle is still 2/3 full after 3+ years... I pass 2 layers of it each tme. It makes it inexpensive in time, does stay clear and offers a good protection. Only thing is that it is a little bit satin but at 6mm it perfectly does the thing on my side.

What next ?

Still to be done is the basing. I have too few bases ready for them, so will have to cut and prepare (far) more. As I usually do, I put them in a bag waiting for bases to be ready. Also, I prefer to run dedicated basing sessions so will anyway wait to have more minis to be based before running a session :


Yep. Not sure they will all fit the 4 ridiculous bases remaining so far ;-).

Now, my French backlog :


So, here are :

  • Line infantry
  • Light infantry skirmishing
  • Lancers of the line
  • Lancers of the guard
  • Elite Hussars companies
  • Carabiniers
  • Foot artillery
  • Horse artillery
  • Limbers
  • remainings of previous backlog, so few of :
    • Hussars
    • Dragoons
    • Cuirassiers
    • Command

Anyway, my current focus is on Prussians.
So this week, I plan doing :

  • 3 Landwehr batalions (24 minis each)
  • 2 Uhlans regiments (12 minis each)

Once this will be done, I will probably change my mind with some english troops (that are nice too ;-)) for which I have an even more huge backlog.

Cheers and stay safe.

Bruno.


Sunday, January 17, 2021

Napoleonic French - 6mm - WIP

 Hi again,

As said in my Prussian WIP I, I am completing my French side in parallel with some French Guard. Here as well, those minis are from Baccus.
Currently planned are 3 old guard infantry batalions and 1 Chasseur de la guarde regiment.
I just ended up with a first set of strips, including command and some line.
Here they are just after first varnish layer.


As usual, light balance is wrong (underlying support is deep flat black, not blue), but however...
Flags are from napflags free flags, resized with inkscape as 7x7 mm side wide, then printed on photo paper. Historically, French flags were far smaller, but with scale, I prefer to size them to the available space left on the minis poles.

Here are two closer views on the command then line strips I did on that session.


Obviously, when looking so close paint job seems really bad looking, but you never see them that close on table top. To give you an order of idea, here is a comparison with a 35 mm height zinnfiguren.

Another time, picture is weird (contrasts are crazy and colours not right) and Zinnfiguren will be addressed in other posts, but it was just to give an order of idea for those not familiar with 6mm.

Next to come are those folks I introduced at the begining of this post, primed 2 weeks ago.


My french army is currently the biggest one I have and it's backlog of to-be-done minis is important. I will probably share on that as the old guard will move forward.

Cheers,

Bruno.


Saturday, January 16, 2021

Napoleonic Prussians - 6mm - WIP

 Hi,

In 2021 I plan finishing my ongoing Pussians.
Here are 2 line regiments, 2 battalions each, I just flocked.
They are 2nd and 3rd as per 1815.
Minis are from Baccus.
Pictures have been taken with a mobile and somewhat yellow light, so shadows are somewhat "greenish", but real colors are OK.


Battalions are sized as Small (3 bases) or Medium (4 bases) so far. Those are my last remaining Prussian Line miniatures, and I had not the exact ratio between command and line. In my next order, I will manage solving that, including some more line bases to extend some Prussians to large units (5 bases) if required.

Next step will be creating their packing box.

So, in addition of now owning 5 line regiments (10 battalions) what is next for 2021 ?

Well, I plan addressing this (in other things)...


In the background are some ready to be primed Uhlans, with others still in their bag. I have material to build 3 to 5 regiments depending on gaming size for units.
Also, in bags are Landwehr (8 to 10 battalions), Command, Hussars (3 to 5 rgts) and 2 artillery batteries (2 guns each).

This is not a big backlog, but I will share as I move forward with those Prussians.

In parallel I am working on some french old guard and command.

As well, I have more important backlog for French and English troops, but that is another topic.

Cheers,

Bruno.

Saturday, October 31, 2009

First home made trees...


Hi there,

Waiting for my first 6mm real division to come, I've started building some terrain when, at a moment, they will have to proove their value;-). Browsing a nice 6mm forum (angel barracks) I found a post pointing to a video showing stunning way making trees. So, I invented nothing, but would like to share my first attempts and to recommand this technic to any people. (I guess such a tree is less than a Euro cent to build, absolutely stunning, and very, very fast to do...)

(fr) Dans l'attente de mes premières divisions en 6mm j'ai commencé à bosser sur des terrains appropriés à l'échelle. En parcourant un super forum dédié au 6mm je suis tombé sur un post pointant une vidéo montrant comment réaliser des arbres super-réalistes à cette échelle. Donc, je n'ai rien inventé, mais souhaite simplement partager mes premiers pas dans ce domaine. (un arbre coute probablement moins d'un cent d'Euro à produire, a un look ultra-réaliste, et est très rapide à faire....)


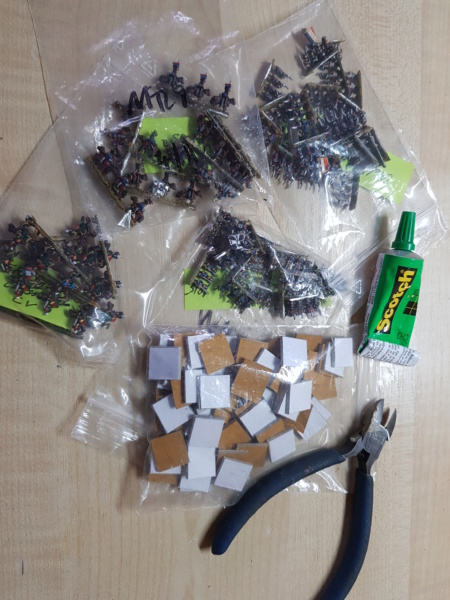
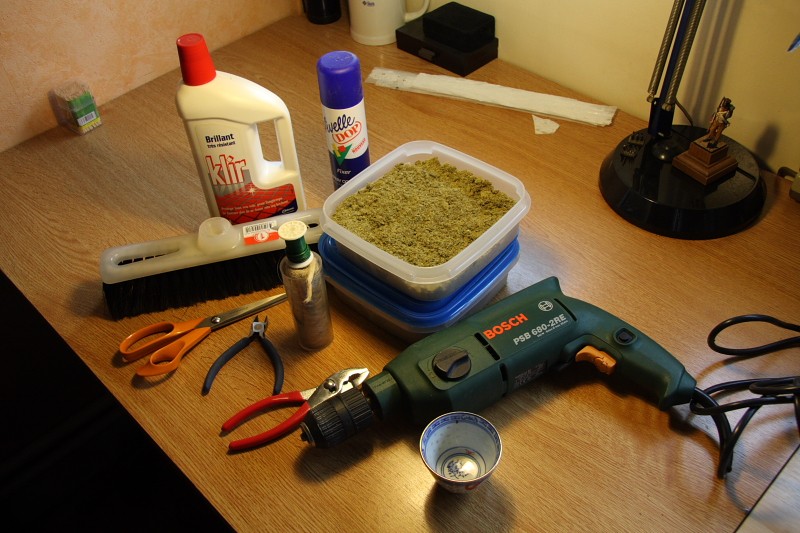
Here is all you need to build hundreds of them. First you need a drilling machine with speed regulation that will be used at the lowest possible speed. Except this (that is somewhat expensive) all furnitures are very cheap :
- 1 fixing hairspray, between 2 and 5 Euros.
- some tainted wooddust for flocking (free if asked with a smile at your local wood store with a cutting machine, then tainted with low cost acrylics (green - blue - brown - yellow in various mixes)
- some oakum (?). Not sure of the English word : This is used in plumbing for etancheity and cost very few as well.
- one toothpick (;-))
- some metal wire.
- few common tools : cuting and regular pliers, cissor, and something in wich to put water
- some Johnson excellent Klir floor varnish to fix the tree once done if you have an aerograph, otherwise a matt varnish or fixing spray.

(fr) Sur la photo précédente tout ce dont vous avez besoin. Primo, il faut disposer d'une perceuse à variateur que l'on utilisera au minimum possible de vitesse de rotation. Mis à part la perceuse, l'équipement requis est vraiment low-cost :
- 1 bombe de hair-spray, fixation forte de préférence. (Elle ne suffira pas à sceller le flocage de toute façon, voir plus loin....)
- Du flocage : perso j'utilise de la sciure de bois teintée avec des peintures acryliques de base. Mis à part la peinture, elle ne vous coutera qu'un sourire à l'atelier de scierie ou découpe de bois le plus proche.
- De la filasse de plomberie. Ca se trouve dans toutes es grandes surfaces de bricolage et coute une poignée de rillette pour des centaines d'arbres potentiels.
- 1 cure dent. ;-)
- Du fil de fer de petit diamètre.
-Des outils courants : pince standard et coupante, ciseaux...
- Du Klir de Johnson pour fixer les arbres une fois terminés (si vous disposez d'un aérographe, sinon une bombe de vernis mat ou un fixateur)

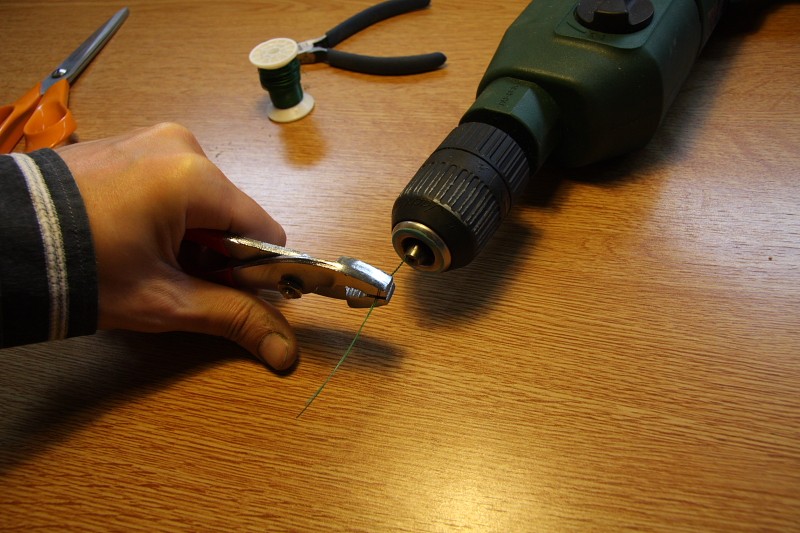
So, first step is to cut a part of metal wire, fold it in twice, then out it in the drilling machine and turn the trunk. One trap I realized by falling in is to make a too small trunk. Don't forget it will be easy to cut it if too long, but if too short, nothing can be done... and it will have to be based.
Use the plier to hold the limit of the trunk, and make the drilling machine running as slowly as possible. As ever with such tools think safety first !!! It is not because no visible potentially harming stuff is around (such as a drill) that you should forget about safety.

(fr) La première étape est de couper un bout de fil de fer, de le plier en deux et de le bloquer dans le mandrin de la perceuse. Avec la pince, maintenir fermement les deux brins à hauteur de tron (sous les premières branches à venir) et torsader le tronc en faisant tourner la perceuse très doucement. Une erreur commune est de trop torsader, ou encore de faire des troncs trop courts. N'oubiez pas qu'il faudra socler, que vous pourrez toujours raccourcir le tronc, mais pas le rallonger... Enfin, important : Sécurité avant tout - Le fait qu'il n'y ai pas de foret engagé ne doit pas vous empêcher de penser sécurité. Imaginez le résultat avec la vitesse au max, perussion engagée ... le fil de fer n'est pas fait pour apprendre à voler, et vos yeux ne sont pas faits pour être crevés...

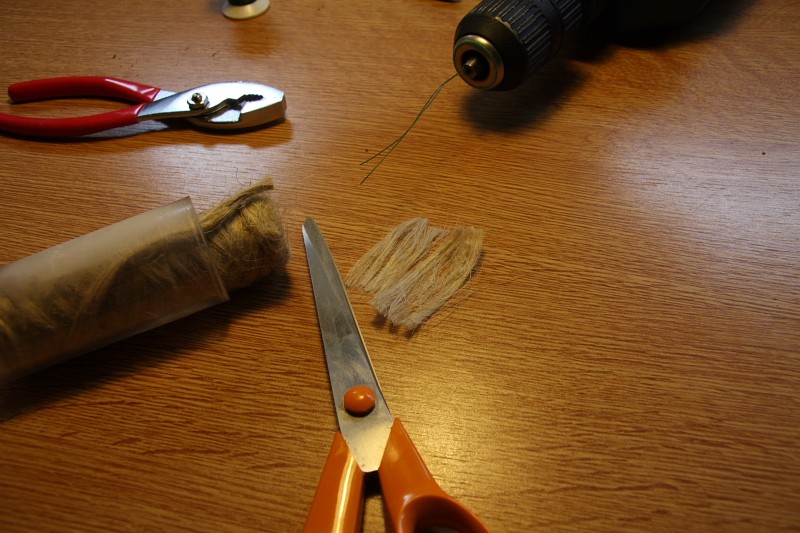
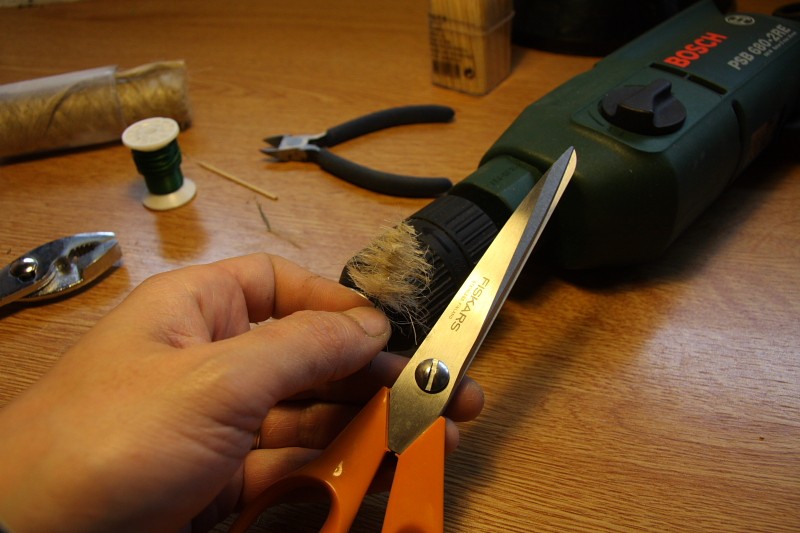
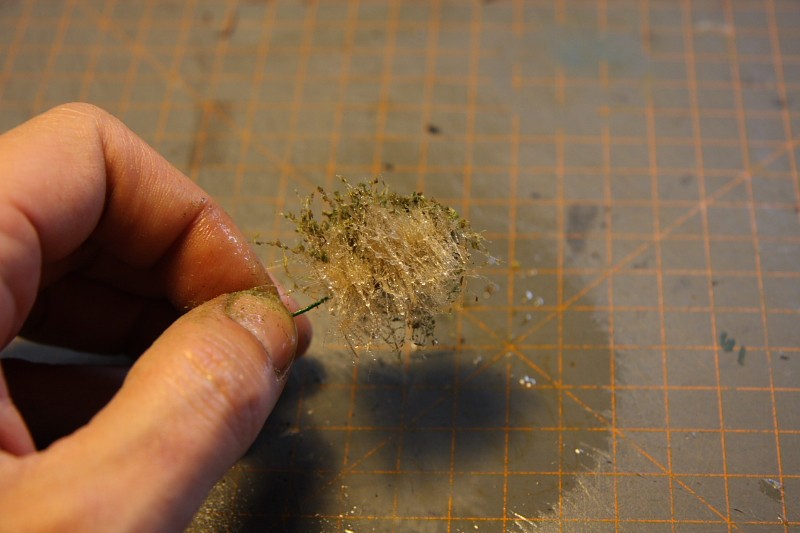
Once your tronk is done, cut one (or more) small length of oakum(?) with scissors. Then, flatten it as shown in the picture. I put the longer length at the base (longer branches) and eventually put several layers, depending on how much you want your tree to be bulky.

(fr) une fois le tronc torsadé, couper une (ou plusieurs) petites longeures de filasse avec des ciseaux. L'étaller comme montré sur la photo. Eventuellement tester plusieurs "couches de filasse" entassées dépendant de l'épaisseur souhaitée pour la ramure. Pensez à mettre les filasses les plus longues en bas.

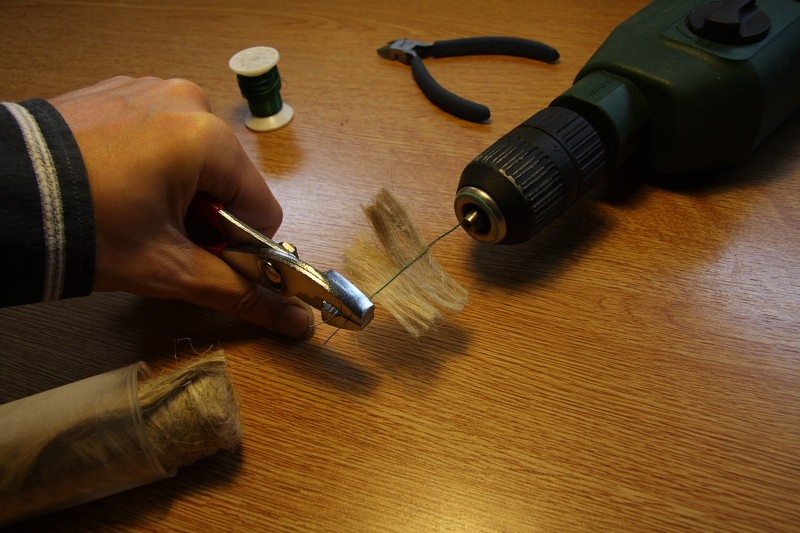
Next step is to put the Oakum(?) between the two metallic wires and hold the two firmly with a plier. You do not need to hold your pliers at the top of your tree and can let some space as this will be cutted later.

(fr) Ensuite, on coince la filasse entre les deux brins de fil de fer et on tient le tout avec la pince. Nul besoin de tenir juste à la cime de l'arbre, bien au contraire : laissez de la marge, on coupera le surplus plus tard.


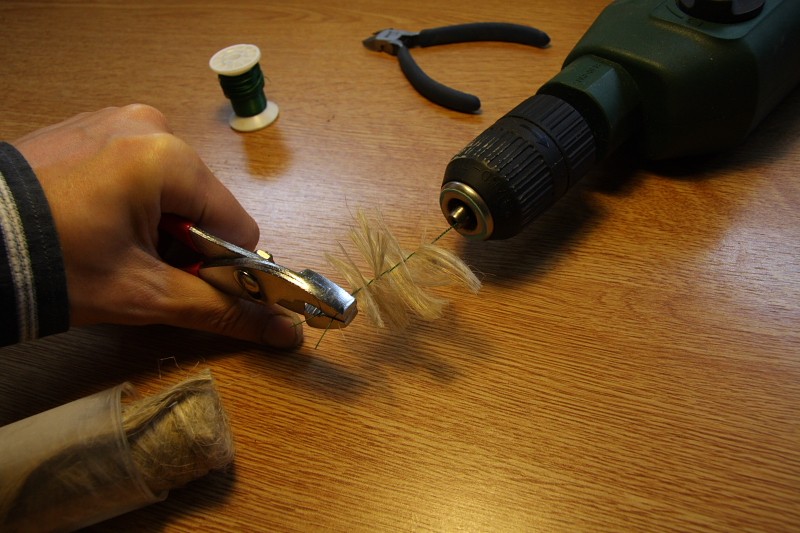
Then, operate the drilling machine very slowly. This is important because the Oakum could wrap around the trunk, so if that happen, first stop drilling, then use a toothpick to disengage the Oakum from the wires, and continue drilling.

(fr) Lancer la perceuse à vitesse très réduite. C'est important car la filasse pourrait s'enrouler autour du tronc pendant le vrillage. Si cela se produit, arréter la perceuse, puis, avec le cure dent, dégager la filasse. Ensuite, reprenez.


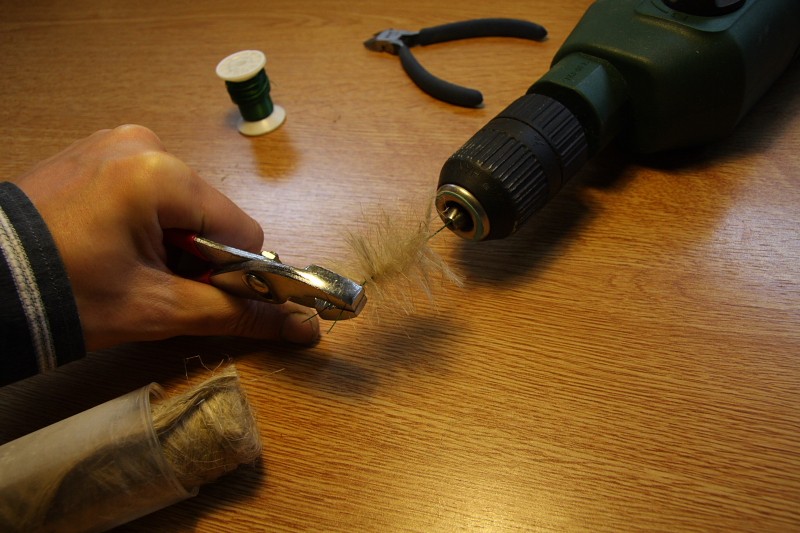
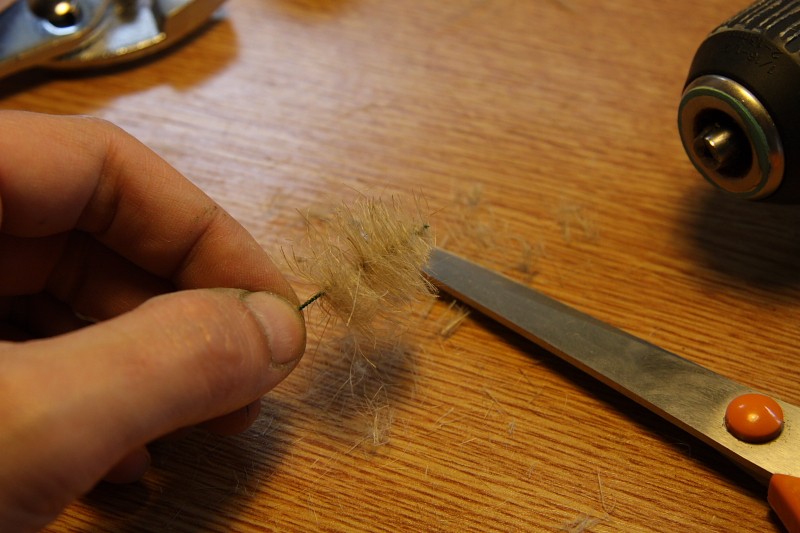
Here we see the tree borning. Do not hesitate to have a real tightened structure, even if it leads you to broke the wire, either from the plier side or the drilling machine side. If it is not tightened enough the Oakum will escape the structure later on.

(fr) Ici, on voit l'arbre naitre. N'hésitez pas à avoir une structure vraiement très torsadée, même si cela conduit à la rupture du fil de fer au niveau de la pince ou du mandrin de la perceuse. Si les vrilles ne sont pas assez serrées la filasse ne tiendra pas suffisamment en place.


Once you are OK with the result, disengage the tree from the drilling machine, cut the top, and use a toothpick to arrange possible bulky cluster.

(fr) Une fois que le résultat vous convient, désengager l'arbre de la perceuse, coupez la cime, et utilisez le cure dent pour démeller les éventuels amas de filasse.


Then, before hair spray, hair cut... (so logical)
Shape your tree with your scissors.

(fr) Avant le spray, une petite coupe ?
Mettre l'arbre en forme en taillant la filasse avec vos ciseaux. Encore une fois, le mieux est l'énemi du bien : ne taillez pas trop court.


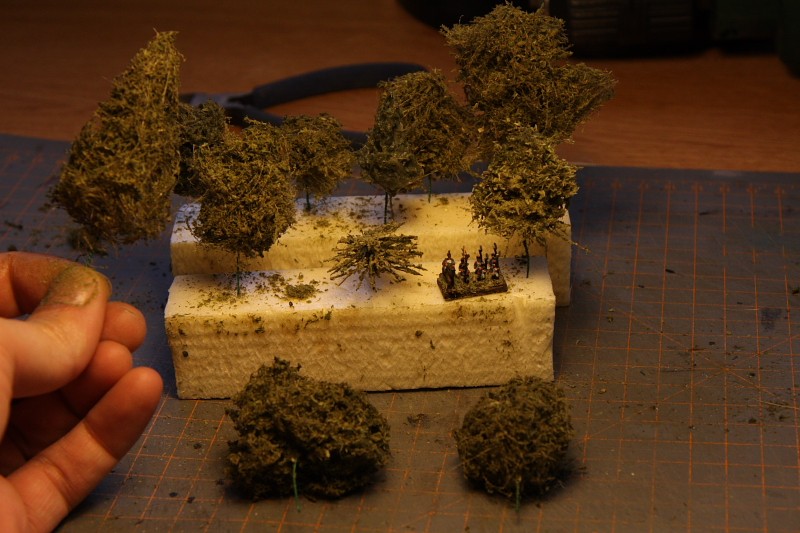
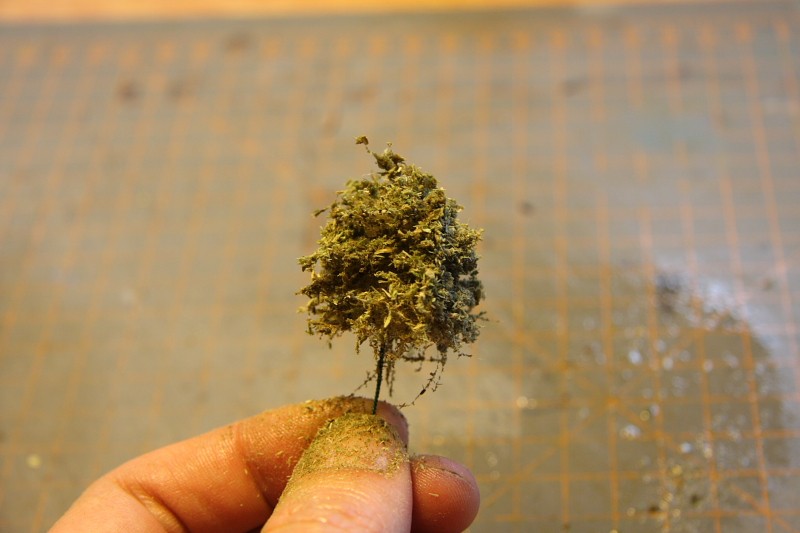
...Up to get a shape you like....

(fr) Ici la forme finale que j'ai retenue pour l'exemple de ce post.


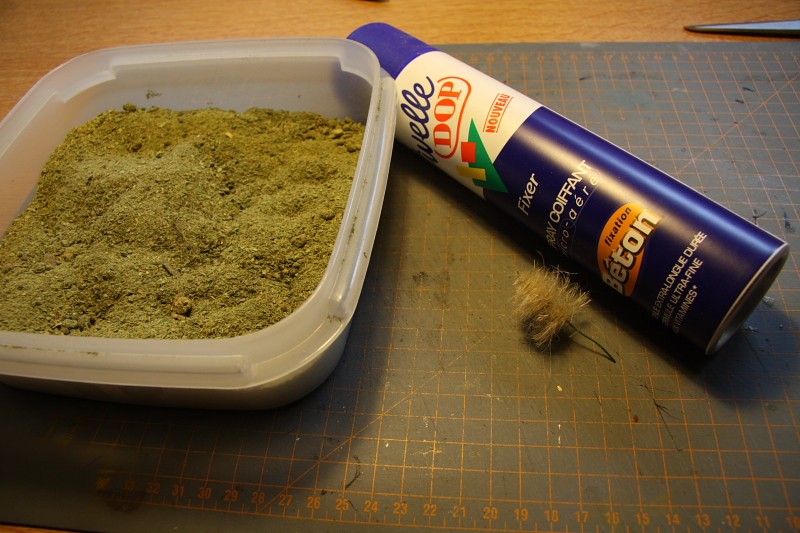
Next step is hair spray. You need some strong hair spray but will not use a lot of it per tree as it won't be enough to seal the flocking stuff in place. For flocking I use wooddust I tainted in various greens.

(fr) Après la coupe, le spray. Mieux vaut avoir un spray fixant ultra fort, mais cela n'empèchera pas de devoir tout fixer au vernis par la suite. Pour le flocage, sciure de bois teintée.

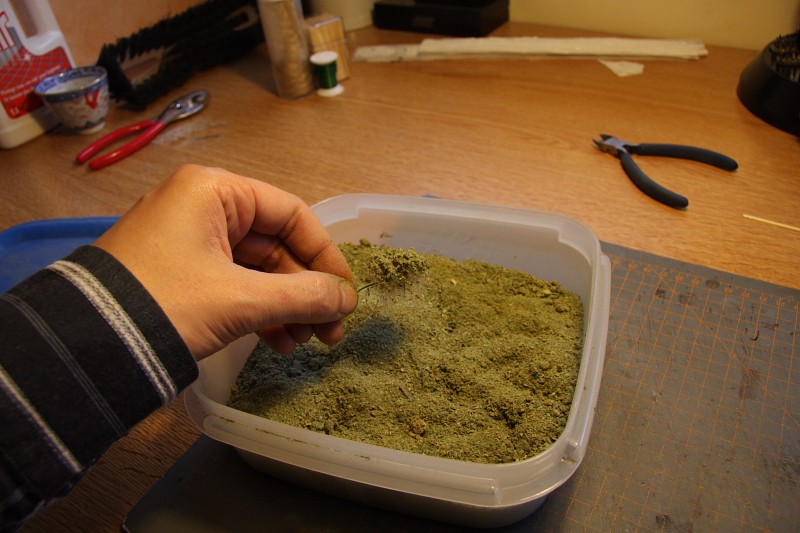
Spray one side, then flock...

(fr) Un petit coup de spray d'un coté, et flocage...


Spray the other side. Don't hesitate if you have some drops of spray : they will not impact the apparence with bad clusters.

(fr) Un petit coup de spray de l'autre... Ne pas hésiter si des goutelettes de spary se forment : Elles ne créeront pas de "pâtés" de flocage. (spray = très volatile)


Repeat on top, bottom, wherever you need to flock in fact, and here it is...
Let it dry and fix the flocking with some sprayed varnish. I used a 50/50 mix of Klir and water. Klir is normally glossy, but wood dust and oakum drink it a bit so it remains flat but really seal the thing in about 30 minutes.

(fr) répéter au dessus, dessous, en fait... partout ou vous pensez devoir rajouter du feuillage.
Laissez sécher, puis fixez le flocage avec un vernis pulvérisé. De mon côté, disposant d'un aérographe, j'utilise du Klir dilué à 50% avec de l'eau. Le klir est normalement brillant, mais ici la sciure (bois) et la filasse (chanvre) boivent le klir, cela permet de consolider le flocage tout en restant mat. Temps moyen de séchage constaté autour de 30 minutes.

So, as I said previously, I did not invent anything there, and probably the original video says it better than I did. Reason of this post was to share my experience of this very nice hint, and the material I used as I could not manage to have the original material used in the video.

Last point : Building the tree of that post took me about 5 minutes, including pictures. Before that I spent one hour making tests (some were not that good), but I think that one can produce tens of those in various sizes in the same time. Not only this is costless, but also very fast. So, real thanks and credits to those who shared the original trick.

(fr) Comme dit précédemment, je n'ai rien inventé et il est probable que la vidéo originale explique les choses mieux que je ne l'ai fait. La raison de ce post est donc de partager mon test de ces techniques, mais aussi les fournitures que l'on peut utiliser en low-cost pour un résultat tout aussi bluffant.

Dernier point: L'arbre de ce post m'a pris autour de 5 minutes, incluant les prises de vues. Avant ça, j'ai passé une heure à faire des tests (plus ou moins réussis, mais peu de déchet), mais je pense qu'une fois la technique acquise on peut faire des dizaines d'arbres dans cette petite heure.
Ce n'est pas seulement économique, mais aussi très rapide... alors... un grand merci à ceux qui ont partagés cette technique sur le net.

Tomorrow I hope having some time to work on marshes and roads.I Will let you know...

(fr) Demain, j'essaierai de travailler un peu sur des marais et des routes. Je vous tiendrais au courant...

Cheers,

Bruno.

Friday, October 9, 2009

Basing again...

So, here is a delayed post coming at last...

(fr) Tout arrive, même un post bien après la deadline annoncée...

I have made experiments in basing and go to 2cm frontage definately.
Any mini will be based independantly, and there will be carrier bases to
support them. (that is what a carrier was meant to at a time ;-) )

(fr) j'ai fait pas mal de tests. J'en suis arrivé à baser chaque fig. en 2x2 cm et
créer des sous bases pour les grouper par 4, 6 ou 8.


Here is a picture of my first bases, with 5 mm border. I feel it's far too
deep, wasting unit coherency when they are putted together
On the picture you will see an empty carrier at first rank.
(you can see the 1cm huge gap between two companies, illustrated here by
some Perry's plastic frenchies)

(fr) ci-après mes premiers test, avec une bordure de sous-base de 5 mm.
Donc 1 cm d'espace entre deux compagnies. Perso, je trouve que ça gâche un
peu le "look" d'unité. Les minis sont les Français plastiques de Perry en 28mm.


I tried making the gap smaller : 2mm border, meaning 4 mm additional space between companies. Thereafter is a simple shot of the result. I tried making the cardboard looking like wood by applying acryliv wood varnish, but the result did not match my espectations. I will probably paint them plain color, black, or brown...
Minis are some of my plastic Victrix Highlanders.
At first rank an empty carrier base.

(fr) J'ai donc réduit le bordure de 5 à 2 mm. 4 mm de gap entre deux unités semble plus raisonnable. Pour la couleur des bordures, j'ai essayé un rendu "bois" en utilisant du vernis acrylique. Le résultat ne me convainc pas. Pour la suitte, probablement un noir satin ou un marron neutre.... on verra.
Les figs sont les highlanders Victrix.
Au premier rang une sous base vide, pour example.


Last but not least, reuse of carrier bases at 10mm scale.
To make gaps acceptable (minis bases are smaller than carrier base in one direction), I put some "grass" on it. I like the look they have.
As a test, there are a French carabinier (1812), a Russian line infantry, and a French 8pdr foot battery.
Funny to see scale difference in the background with 28mm stuff...

(fr) Enfin, une réutilisation des sous-bases pour des minis. au 10mm.
On y trouve deux plaquettes de carabiniers Français, d'infanterie de ligne Russe, et une(mini;-)) batterie Française à pied de 2 pièces de 8. Leurs socles étant pls petits que la sous base dans une direction, j'ai floqué la sous base pour rendre le "jour" acceptable. J'aime bien le résultat.

Bruno.

Tuesday, September 15, 2009

Painted Victrix Highlanders - Part I

In a previous post, I proposed a review of Victrix's 28mm plastic Highlanders. During that review, I built a test set of 15 miniatures covering quite all possible positions. Here are the first part of them just painted.
Bear in mind that those have been painted for wargaming, not collection, so the paint is far being "art painting". Those 7 figures were painted in about 6 hours, so not really fast painting, but the 8 remaining will be, so they should be published as well by end of this week.
As ever, click on pictures to see large view (600x900). The painting does not gives justice to those wonderfull minis, but the large views should let you apreciate Victrix's job on those little gems.

(fr) Dans un post précédent, j'ai proposé une revue des Highlanders de Victrix au 28mm. Durant cette revue, j'ai construit 15 figurines couvrant la quasi-totalité des positions disponibles dans cette boite. Voici les 7 premières peintes.
Gardez à l'esprit qu'elles l'ont été en vue de faire du wargame, pas de la collection. La peinture est donc loin d'être exceptionnelle, visant surtout la vitesse. (J'en ai ~300 en stock). Ces 7 premières figurines ont été peintes en ~6 heures, donc pas vraiement du "fast paint", mais les prochaines subiront ce (triste ?) sort, et devraient donc être avoir leur post d'ici ce Week-End.
Comme toujours, cliquez les images pour les voir en large (600x900). La peinture ne leur rend pas justice, mais ces gros plan vous permettront de voir la superbe gravure dont Victrix nous a gratifiés avec cette boite.

Standard bearer / Porte étendard :


I confirm the Victrix flag is too big for the pole. As I did not wanted to cut it, I scaned it, resize it to a height of 3.25 cms and print it. Te result is not as beautifull as Victrix's original, but my paper being less thick, it really eased the assembly.

(fr) Je confirme que les drapeaux Victrix sont trop hauts : impossible de les assembler sur l'étendard. Plutôt que de charcuter les originaux, j'ai scanné, réduit et imprimé à la taille de 3,25 cm. Le réultat est un peu moins chouette que les originaux, mais mon papier (moins épais) a rendu l'assemblage très facile.

Officer / Officier :


Bagpipe piper / Cornemusier :


Here is the first kilt I ever did. I had several test, and finally decided not to try recreate the exact cameron's tartan : result at the scale was awfull. I simplify the "design" still using the key colors (Blue, Green, red and yellow). Result is good, but the global color does not match cameron's tartan. To have a coherent unit I will keep that one, but will try to do better with next unit.

(fr) Voici le premier kilt que j'ai réalisé. Après plusieurs tests, j'ai finalement laissé tomber le schéma exact du tartan des Cameron highlander : A l'échelle le résultat était horrible. J'ai donc simplifié le schéma tout en untilisant les couleurs originales (bleu, vert, rouge et jaune). Le résultat est sympa, mais la couleur globale ne correspond pas à celle du tartan des Camerons. Pour cette unité, je garderais donc ce schéma (cohérence) mais essaierai de faire mieux la prochaine fois.

Drummer / Tambour :


As you can see I made a mistake when assembling the drum : One half is top/bottom and the other bottom/top. Parts are designed to avoid this, but more care have to be done to this assembly than I did.

(fr) Comme on peut le voir, je me suis trompé dans l'assemblage du tambour. La moitié avant est montée à l'envers (haut/bas). Les pièces disposent pourtant de détrompeurs, mais il est clair qu'il faudra leur accorder plus d'attention que je ne l'ai fait sur ce coup là.

Sergeant / Sergent :


Marching private / Soldat marchant (I/II) :


Marching private / Soldat marchant (II/II)


On TMP forum I was recently told that when marching, British soldiers kept the right arm on their side, and were not balancing it. I was not aware of that, so thanks again. It seems that with the body position of marching soldier II such assembly is not possible : The amunition box is too much forward.

(fr) Sur le forum TMP, on m'a récemment appris que les soldats Anglais marchaient avec le bras droit collé au corps et ne le balançaient pas. Il semble qu'avec le corps choisi pour l'assemblage du soldat marchant II ce ne soit pas possible : la besace à cartouches gène, étant positionnée très en avant.

That's all folks...

OK, so it's all for today. Only 53 more to do ... so, back to painting ;-)...
Hope you enjoyed,

C'est tout pour aujourd'hui. Plus que 53 à faire ... j'y retourne ;-)
A+,


Bruno.